How to Change Color in Photoshop: 5 Methods (Step by Step)

Prateek Gupte

To change the color of an object in Photoshop, select the object, add a Hue/Saturation adjustment layer, and drag the Hue slider until you hit the color you want. For a fast one-shot swap, useImage > Adjustments > Replace Color. For results that keep the fabric texture and shadows intact, paint on a new layer set to the Color blend mode. Each method has a job it does best, and this guide walks through all five.
Here is the thing most tutorials skip: changing one image is the easy part. The hard part is volume. Run an online store and need the same hoodie in eight colorways across fifty SKUs, and recoloring by hand turns into a week you don’t have. This guide covers how to change color in Photoshop the manual way, method by method, then shows you where the manual route stops scaling.
Key Takeaways
Fastest swap: a Hue/Saturation adjustment layer is non-destructive and stays fully editable.
Most precise: select or mask the object first so the recolor only hits what you want.
Most realistic: paint on a layer set to the Color blend mode to keep texture, folds, and shadows.
Exact brand colors: use Replace Color or a solid-color fill clipped to your selection to hit a specific hex.
At scale: hand-masking doesn’t work for dozens of product color variants, an AI tool like Caimera’s Recolor generates them in minutes at 2 credits each.
When Priya, a solo founder running a streetwear label, needed her new crewneck shown in five colors for a Friday drop, she opened Photoshop on Monday and was still masking sleeve seams on Wednesday. The methods below would have saved her two days. The alternative at the end would have saved her three.
Before you start: set up for a non-destructive recolor
Work non-destructively. That means you never paint directly on your original pixels, so you can undo, tweak, or rebuild a color at any point without redoing the whole edit.
Two habits make every method below easier:
Duplicate your layer first
(Cmd/Ctrl + J), or better, use adjustment layers so the original stays untouched.
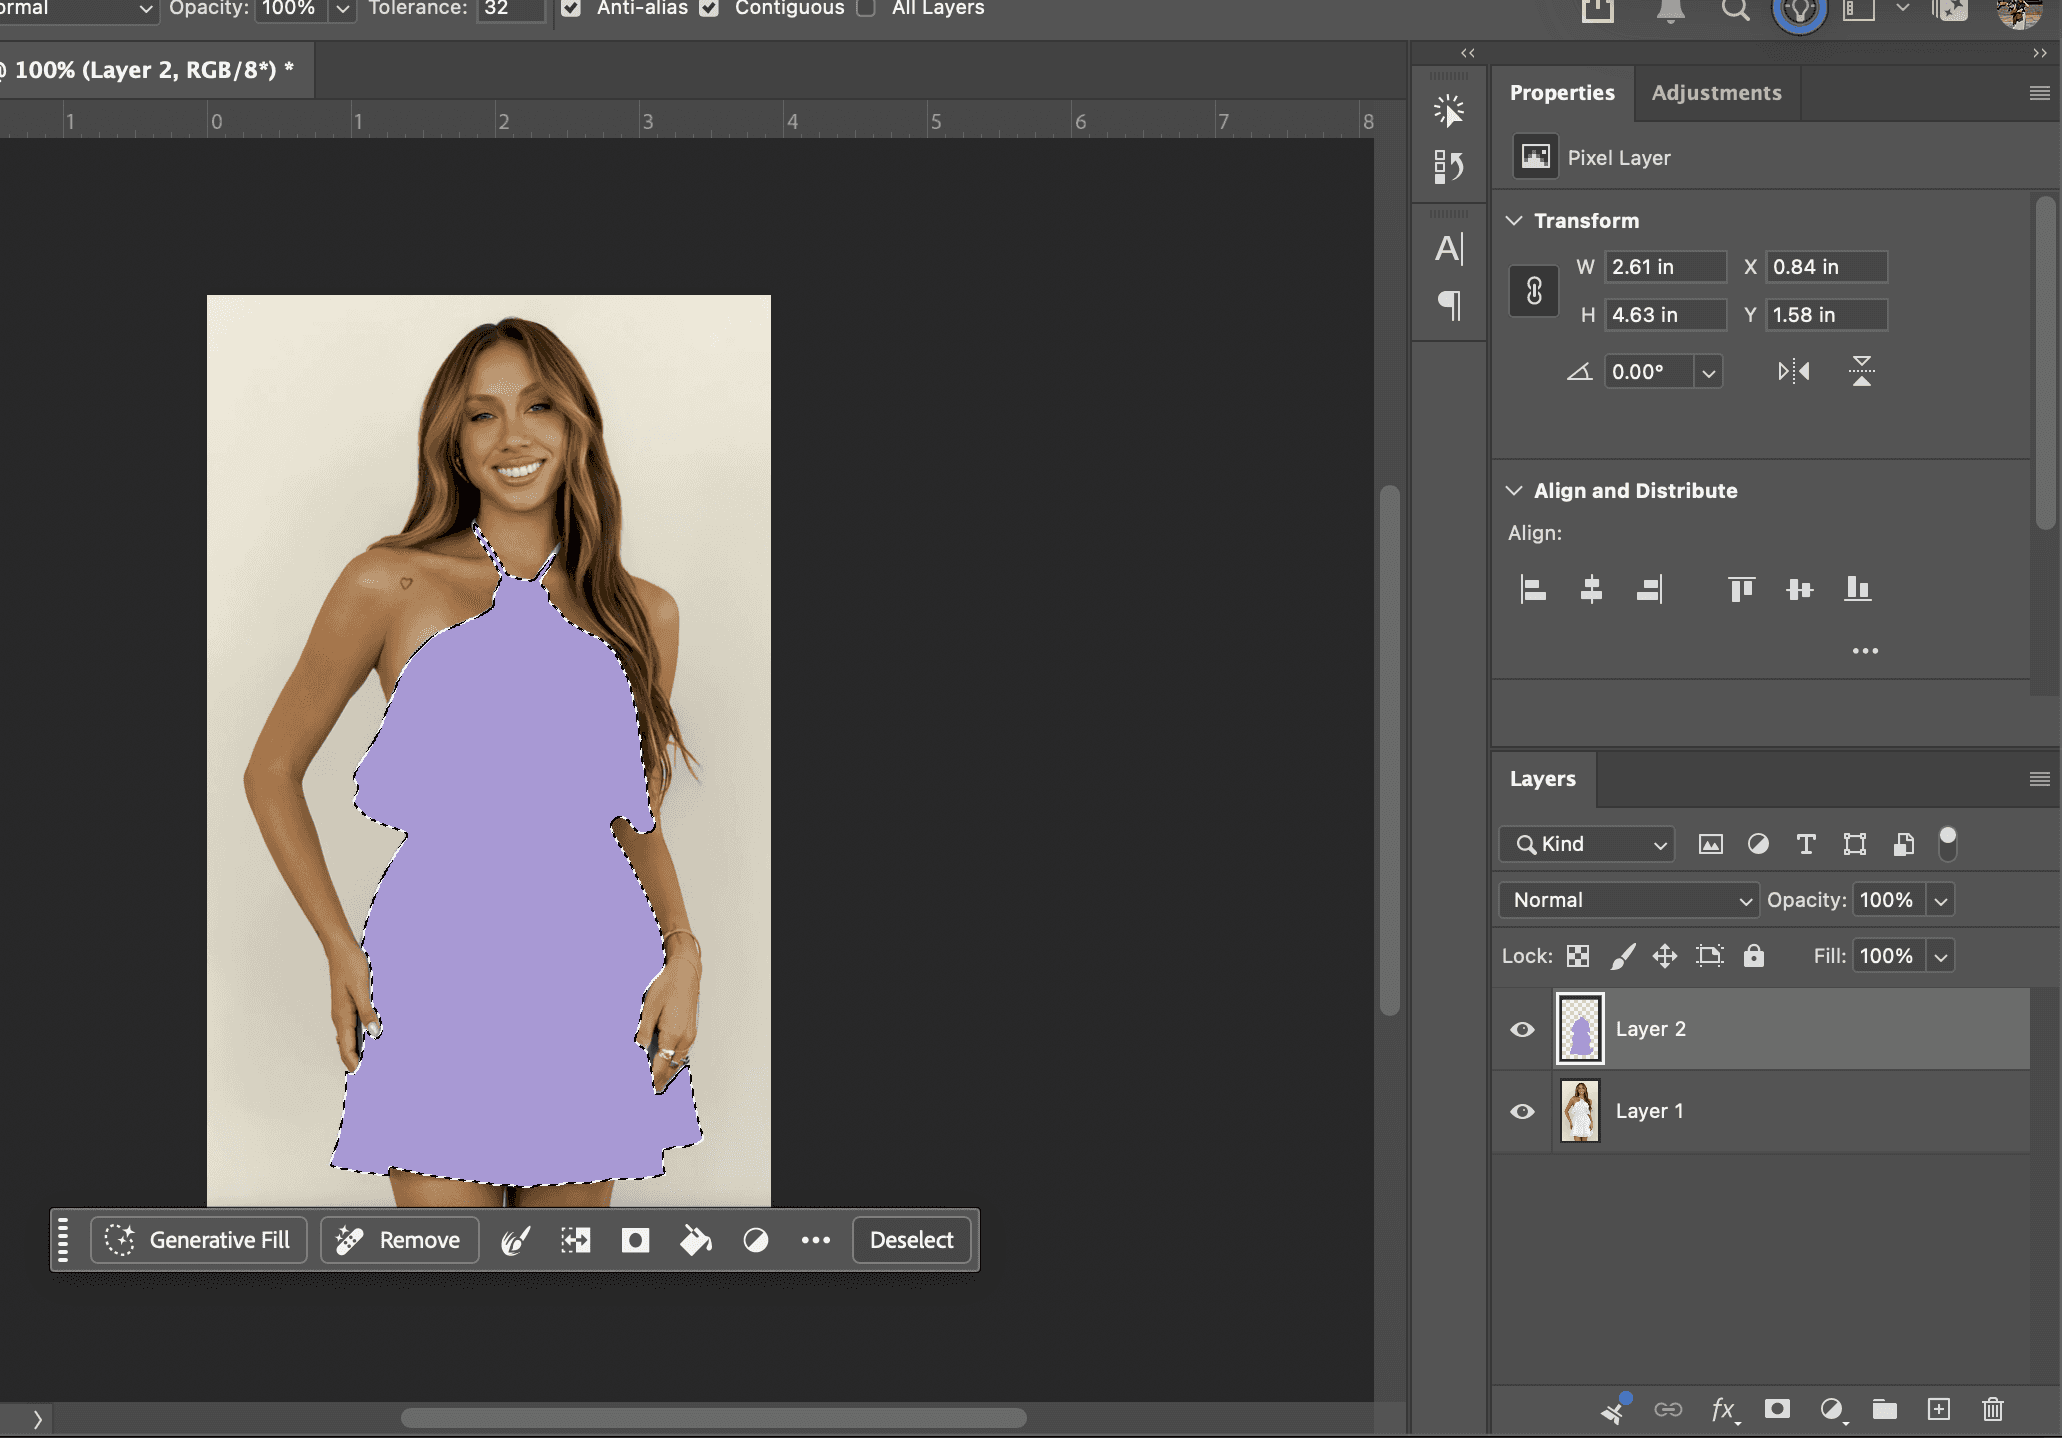
Select the object before you recolor it.
A selection (or a layer mask) tells Photoshop to change only the shirt, not the model’s skin or the background.
For clean selections, useSelect > Subjectfor a one-click starting point, then refine with the Quick Selection tool orSelect and Mask. The better your selection, the more believable your recolor. This single step separates a pro result from an obvious edit, especially around hair, edges, and semi-transparent fabric.
Want to skip the masking entirely later on? Hold that thought. First, the methods.
Method 1: Hue/Saturation adjustment layer (the everyday method)
This is the method you will reach for most often when you change color in Photoshop. It’s fast, fully editable, and non-destructive.
Step by step:
Select your object (Select > Subject, then refine).
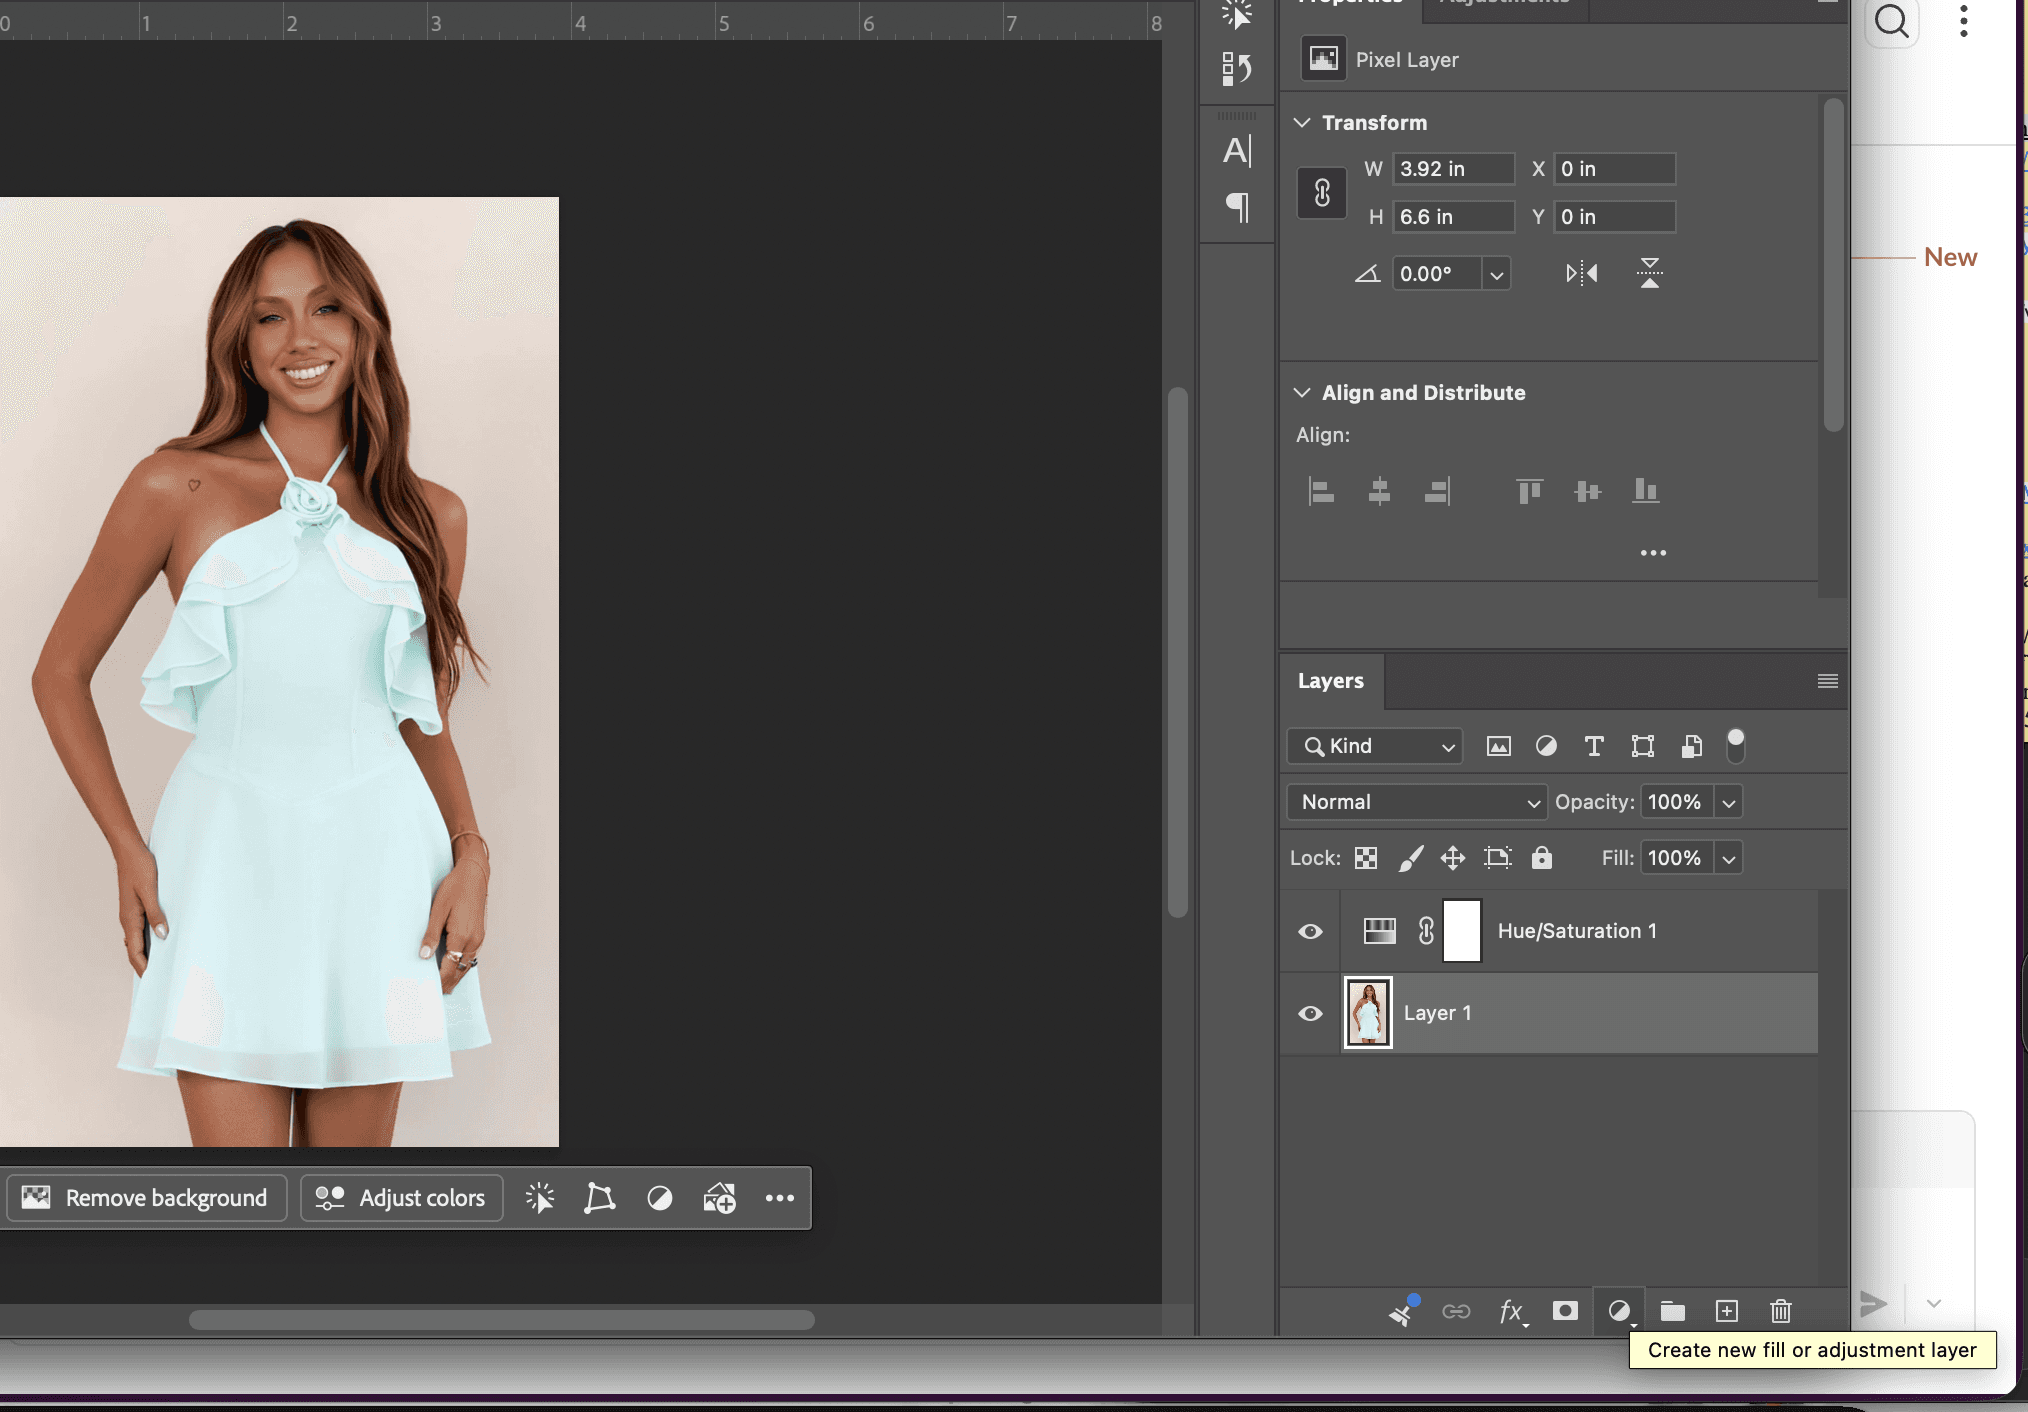
In the Layers panel, click the adjustment-layer icon and chooseHue/Saturation. Your selection becomes a layer mask automatically.
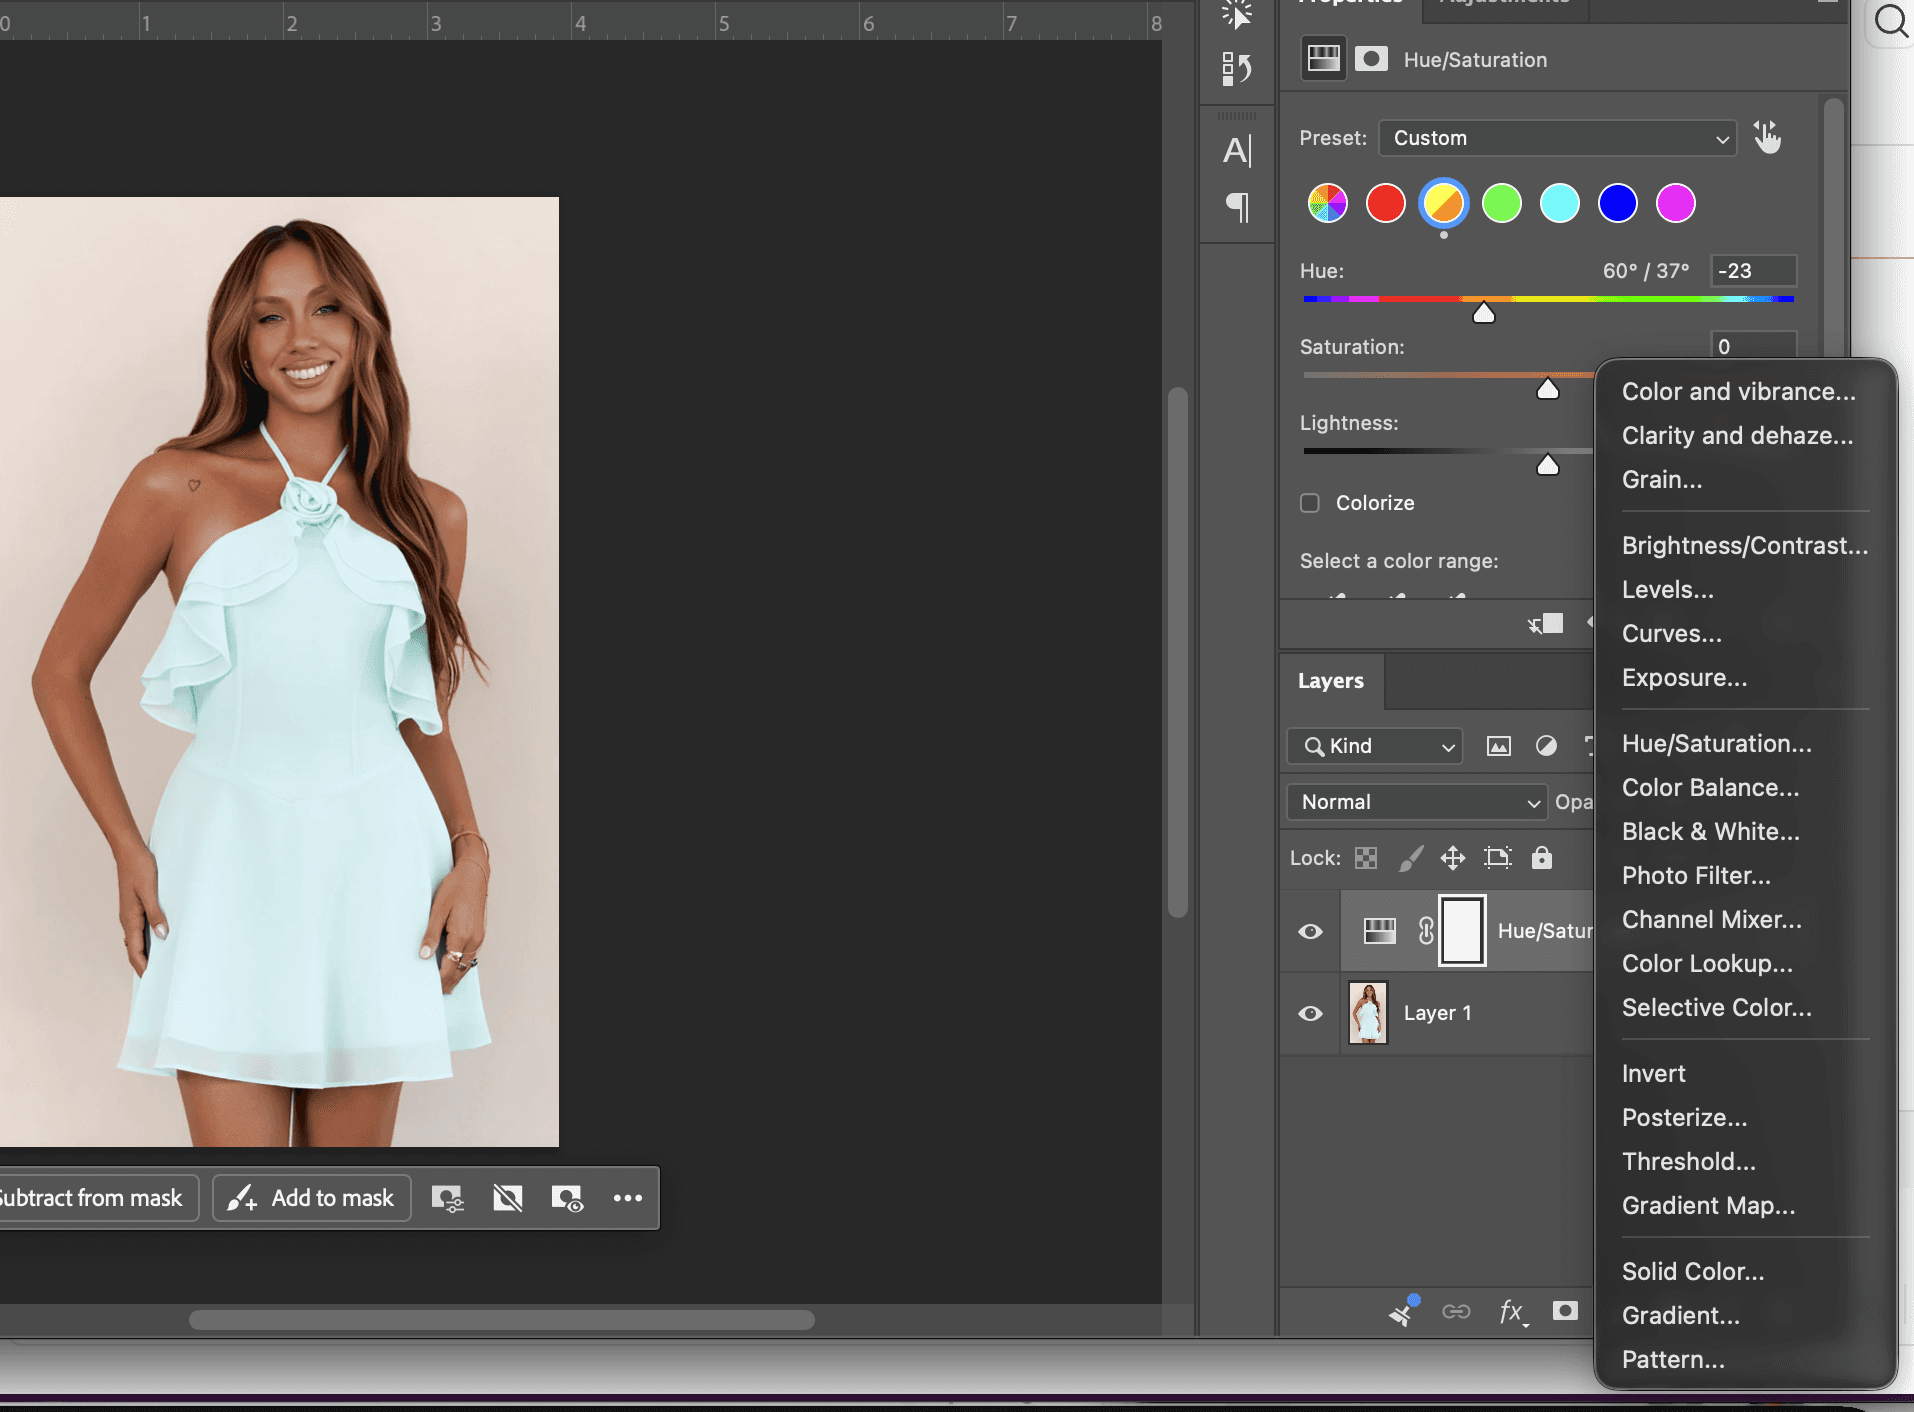
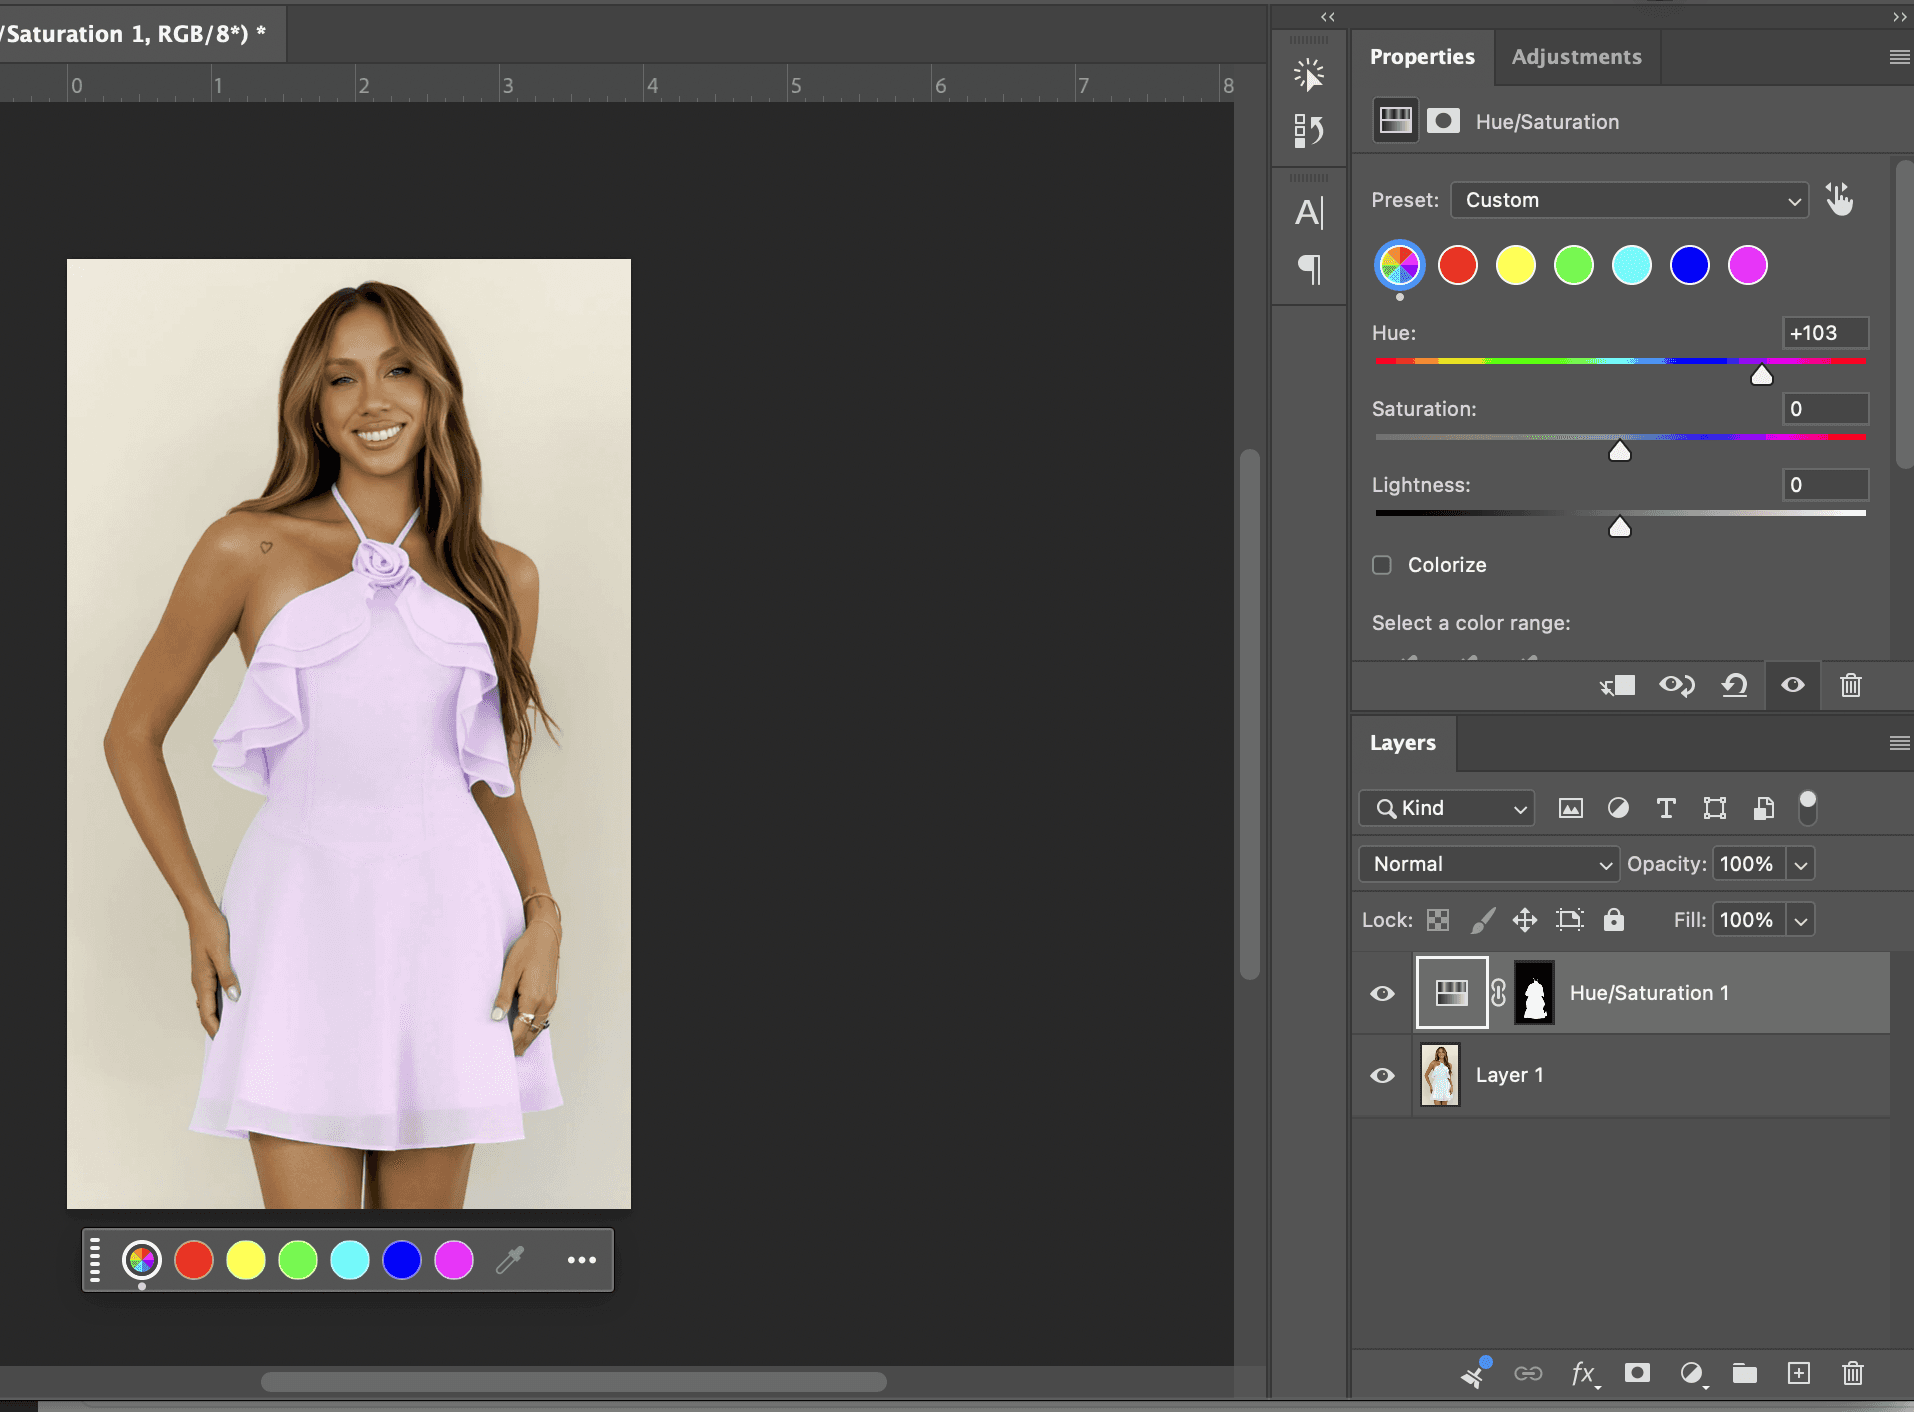
In the Properties panel, drag the Hue slider to shift the color. Adjust Saturation and Lightness to match the original’s richness.

To target only one color range (say, just the reds), switch the dropdown from “Master” to that channel and use the eyedroppers to sample.
Best for:quick hue shifts on a clearly colored object, like turning a red jacket blue. It struggles with white, black, or near-gray items, because there is little color information to shift. For those, use Method 4 or 5.
The keyboard shortcut Cmd/Ctrl + U opens a Hue/Saturation adjustment directly, one of the fastest ways to recolor in Photoshop when you’re moving quickly. Adobe’s Hue/Saturation reference covers every slider in detail.
Ready to compare the manual route against a faster one?Keep the methods in mind as you read, the trade-off becomes obvious by the end.
Method 2: Replace Color (one specific color across an image)
Replace Color is built for swapping a single color wherever it appears. It’s the closest thing Photoshop has to “find and replace” for color, a request that comes up constantly in r/photoshop threads.
Step by step:
Go to Image > Adjustments > Replace Color.
With the eyedropper, click the color you want to change in your image.
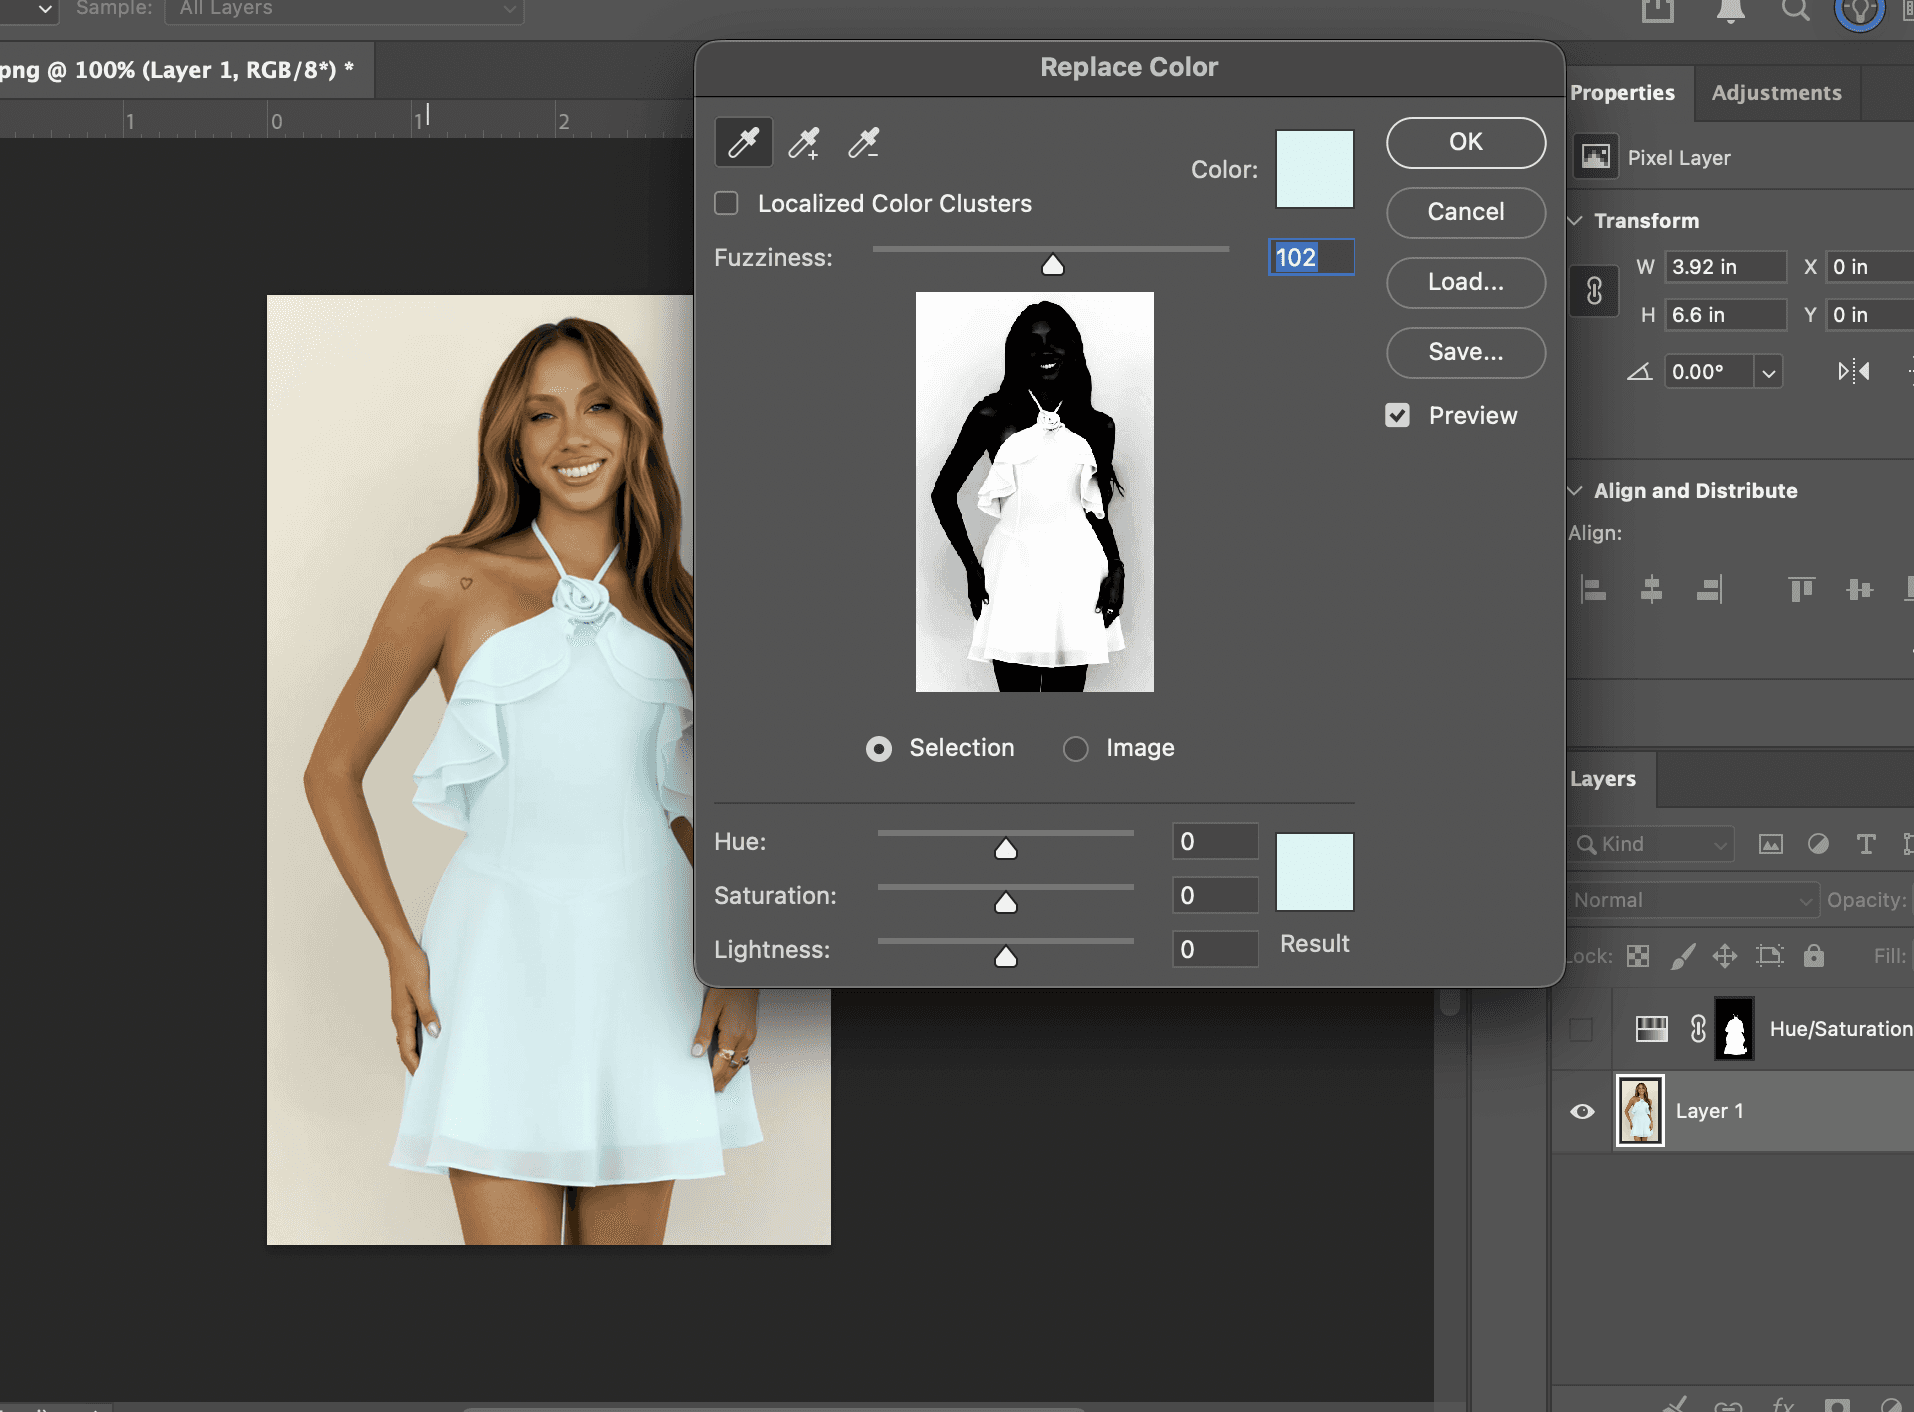
Drag the Fuzziness slider to widen or narrow the range of color selected.
Use the Hue, Saturation, and Lightness sliders at the bottom to dial in the replacement color. Add to the selection with the plus-eyedropper if you missed any areas.
Best for:swapping one specific color across an image, such as recoloring a logo or a single accent. Because it works on the whole image at once, it can be quicker than masking, as long as that color doesn’t appear anywhere you want to keep unchanged. Adobe’s ownReplace object colors guidecovers the Hue/Saturation variant of this in more depth.
Method 3: Color Replacement Tool (paint by hand)
The Color Replacement Tool is a brush. You paint the new color directly onto the area, and Photoshop preserves the underlying texture and shading as it goes.
Step by step:
Set your desired color as the foreground color.
Find the Color Replacement Tool nested under the Brush tool in the toolbar.
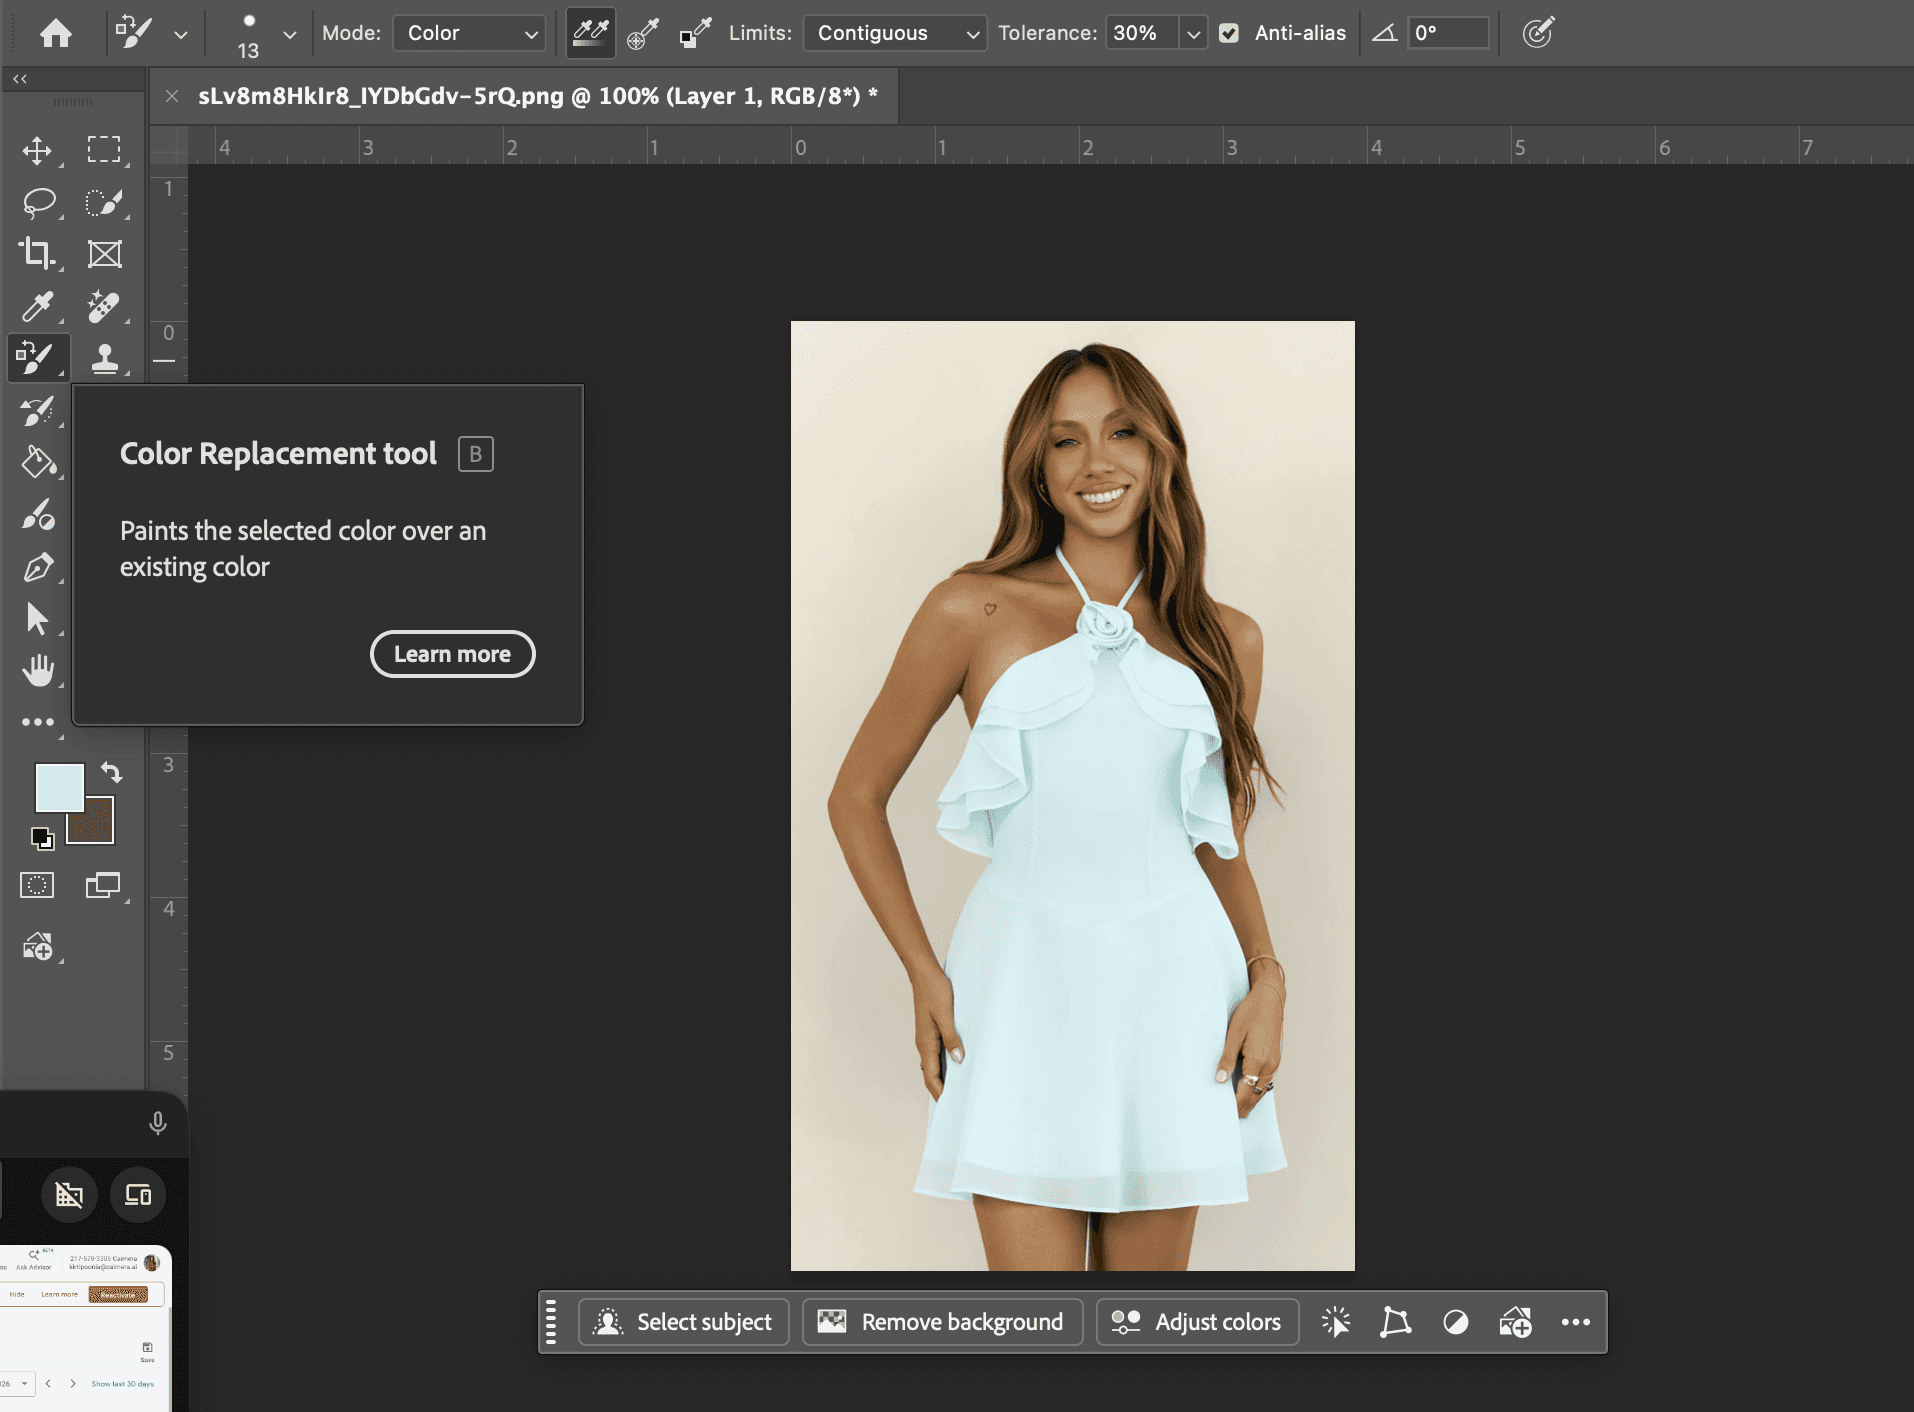
In the options bar, set Mode to Color and Sampling to Continuous.
Paint over the area. The brush samples as you move, so keep the crosshair on the target color and avoid edges you want to protect.
Best for:small areas, touch-ups, and detail work where a full mask is overkill, like recoloring a button, a stripe, or a pair of laces. It’s less reliable across large or complex surfaces, where painting gets tedious and uneven.
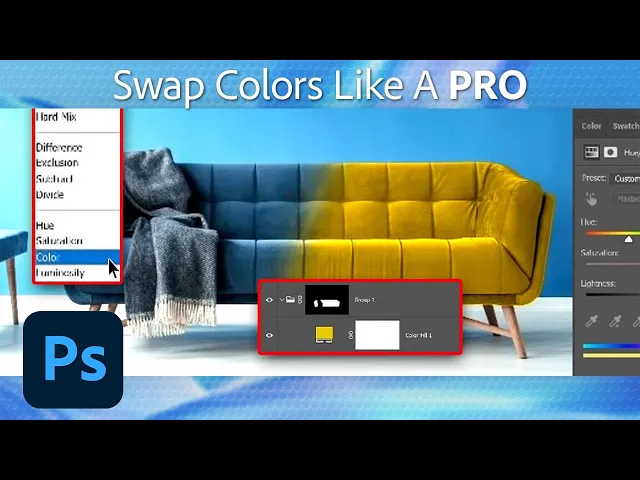
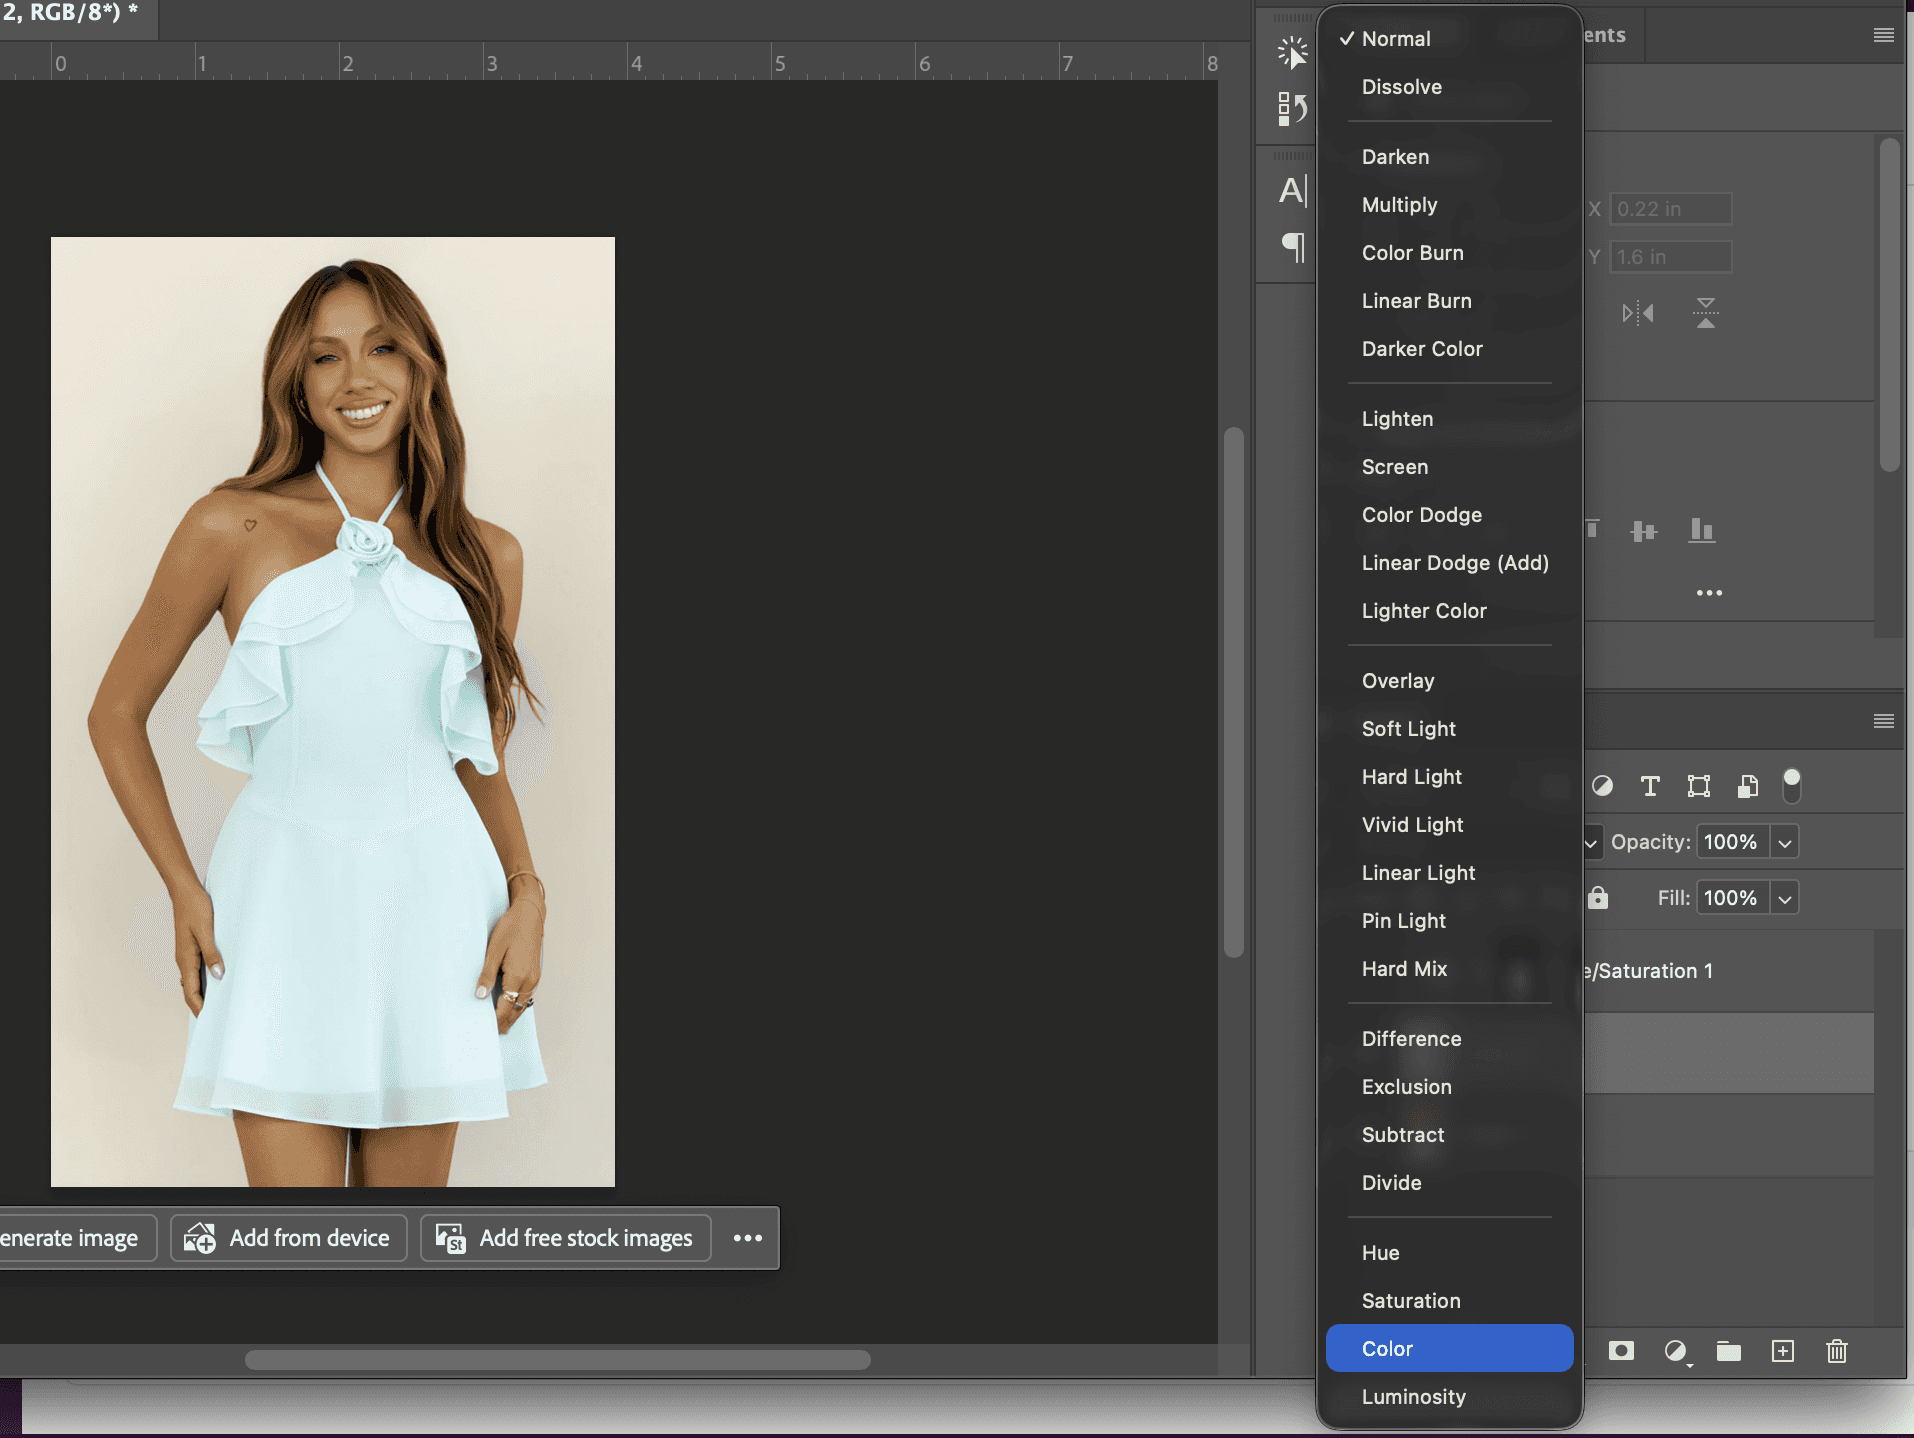
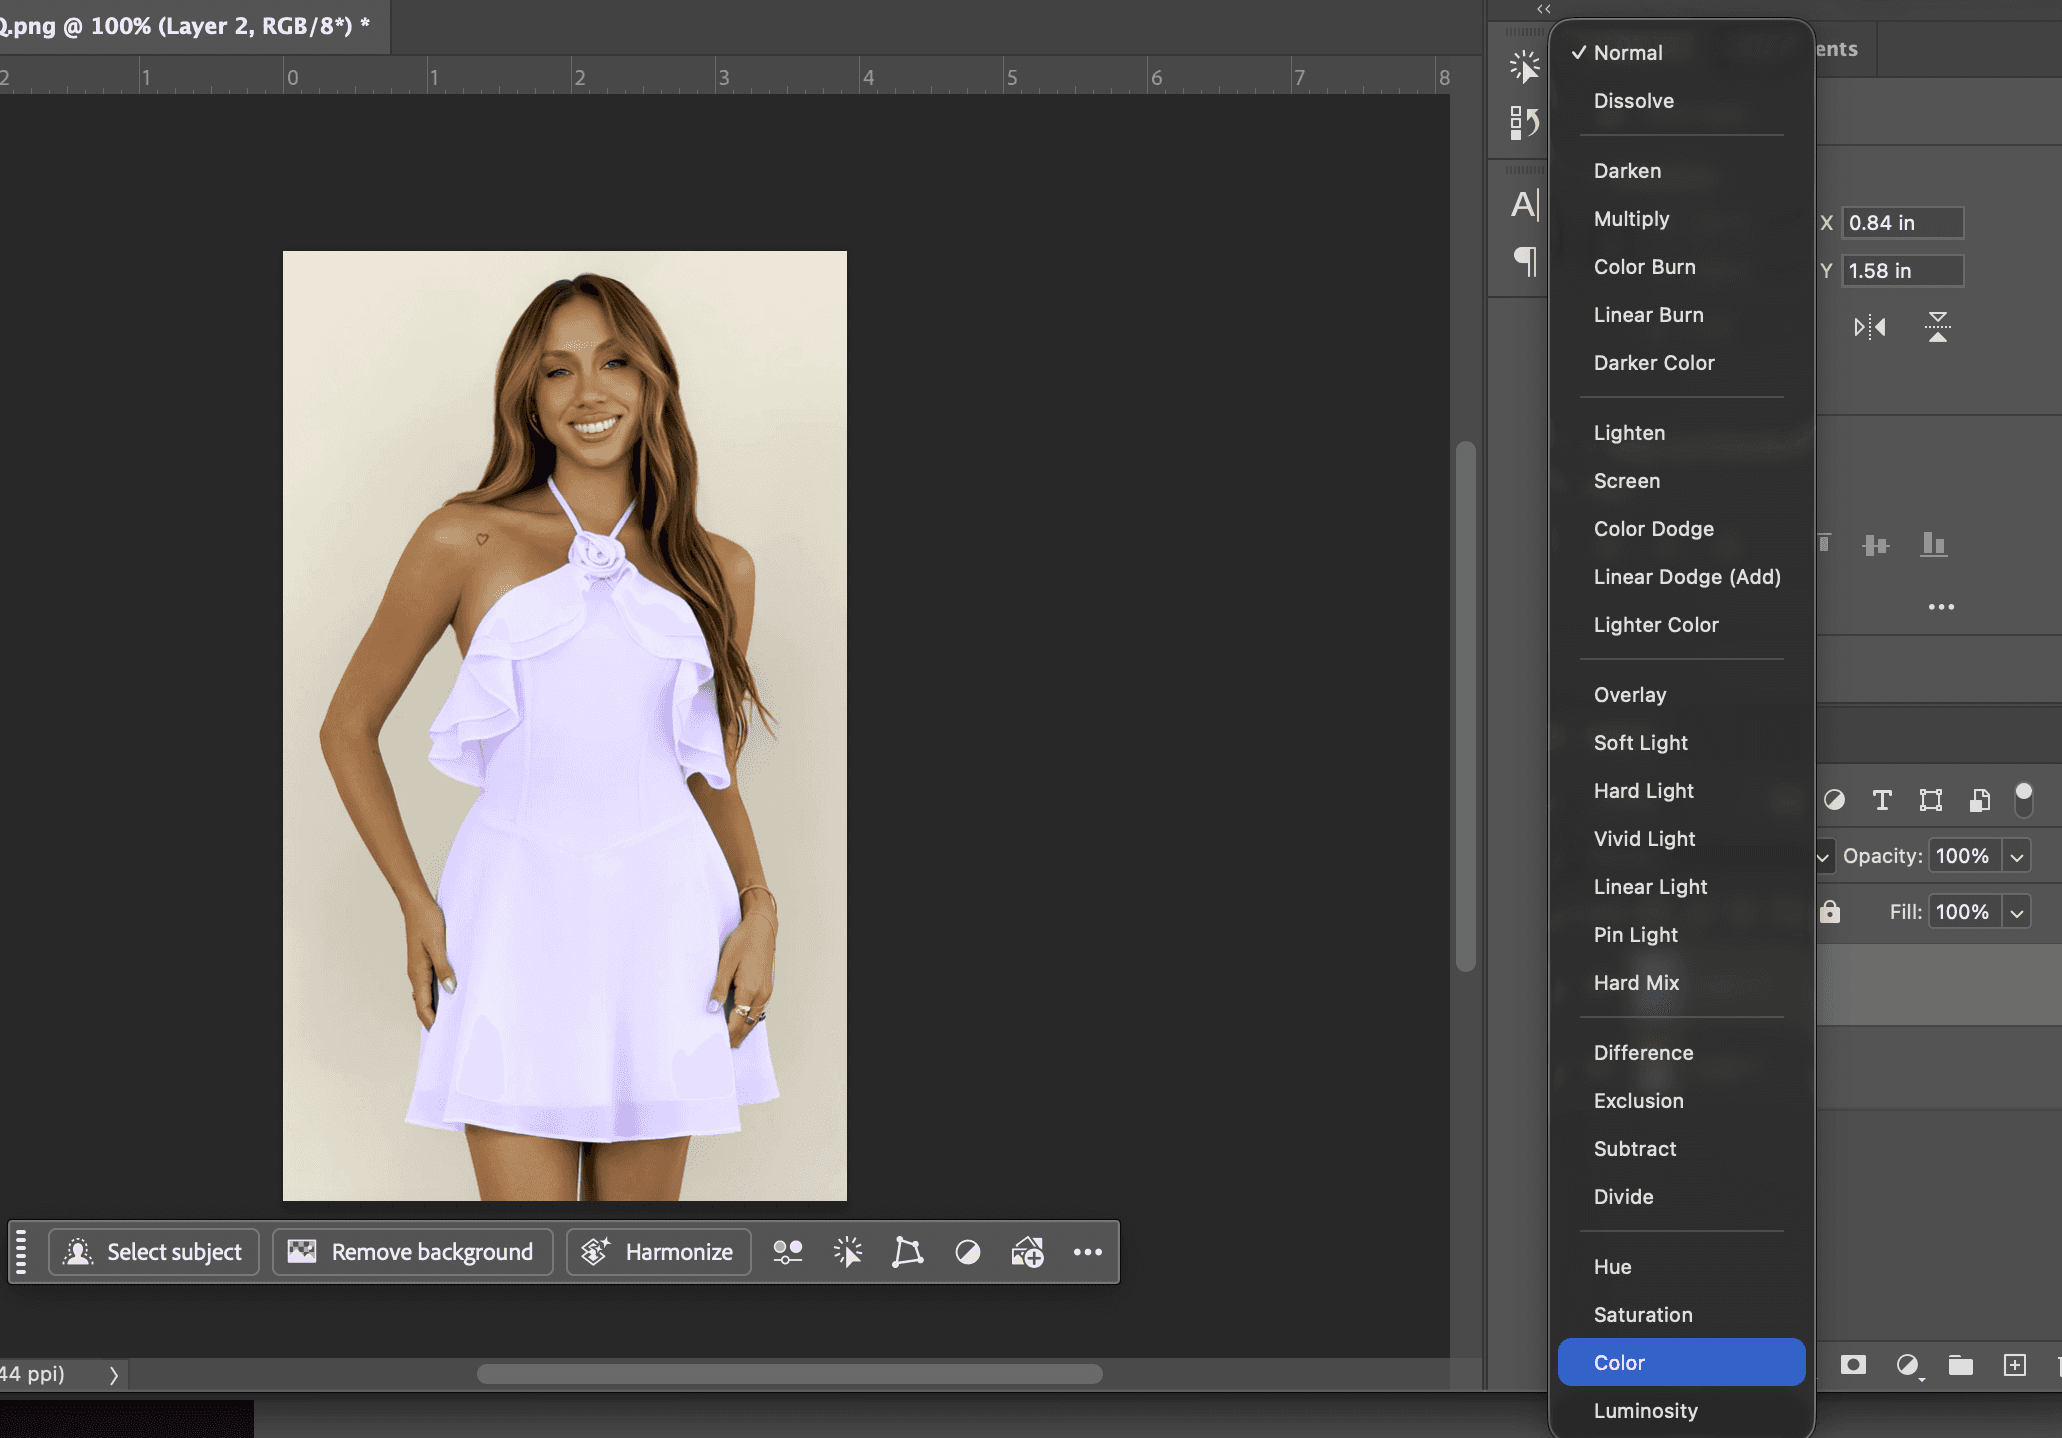
Method 4: Paint on a Color blend-mode layer (the most realistic)
This is the answer to the most-asked question on this topic:how do you change color in Photoshop without losing texture?Blend modes are the secret. The Color blend mode applies hue and saturation while keeping the original’s brightness, so every fold, shadow, and highlight survives.
Step by step:
Create a new blank layer above your image.
Set that layer’s blend mode to Color (in the Layers panel dropdown).
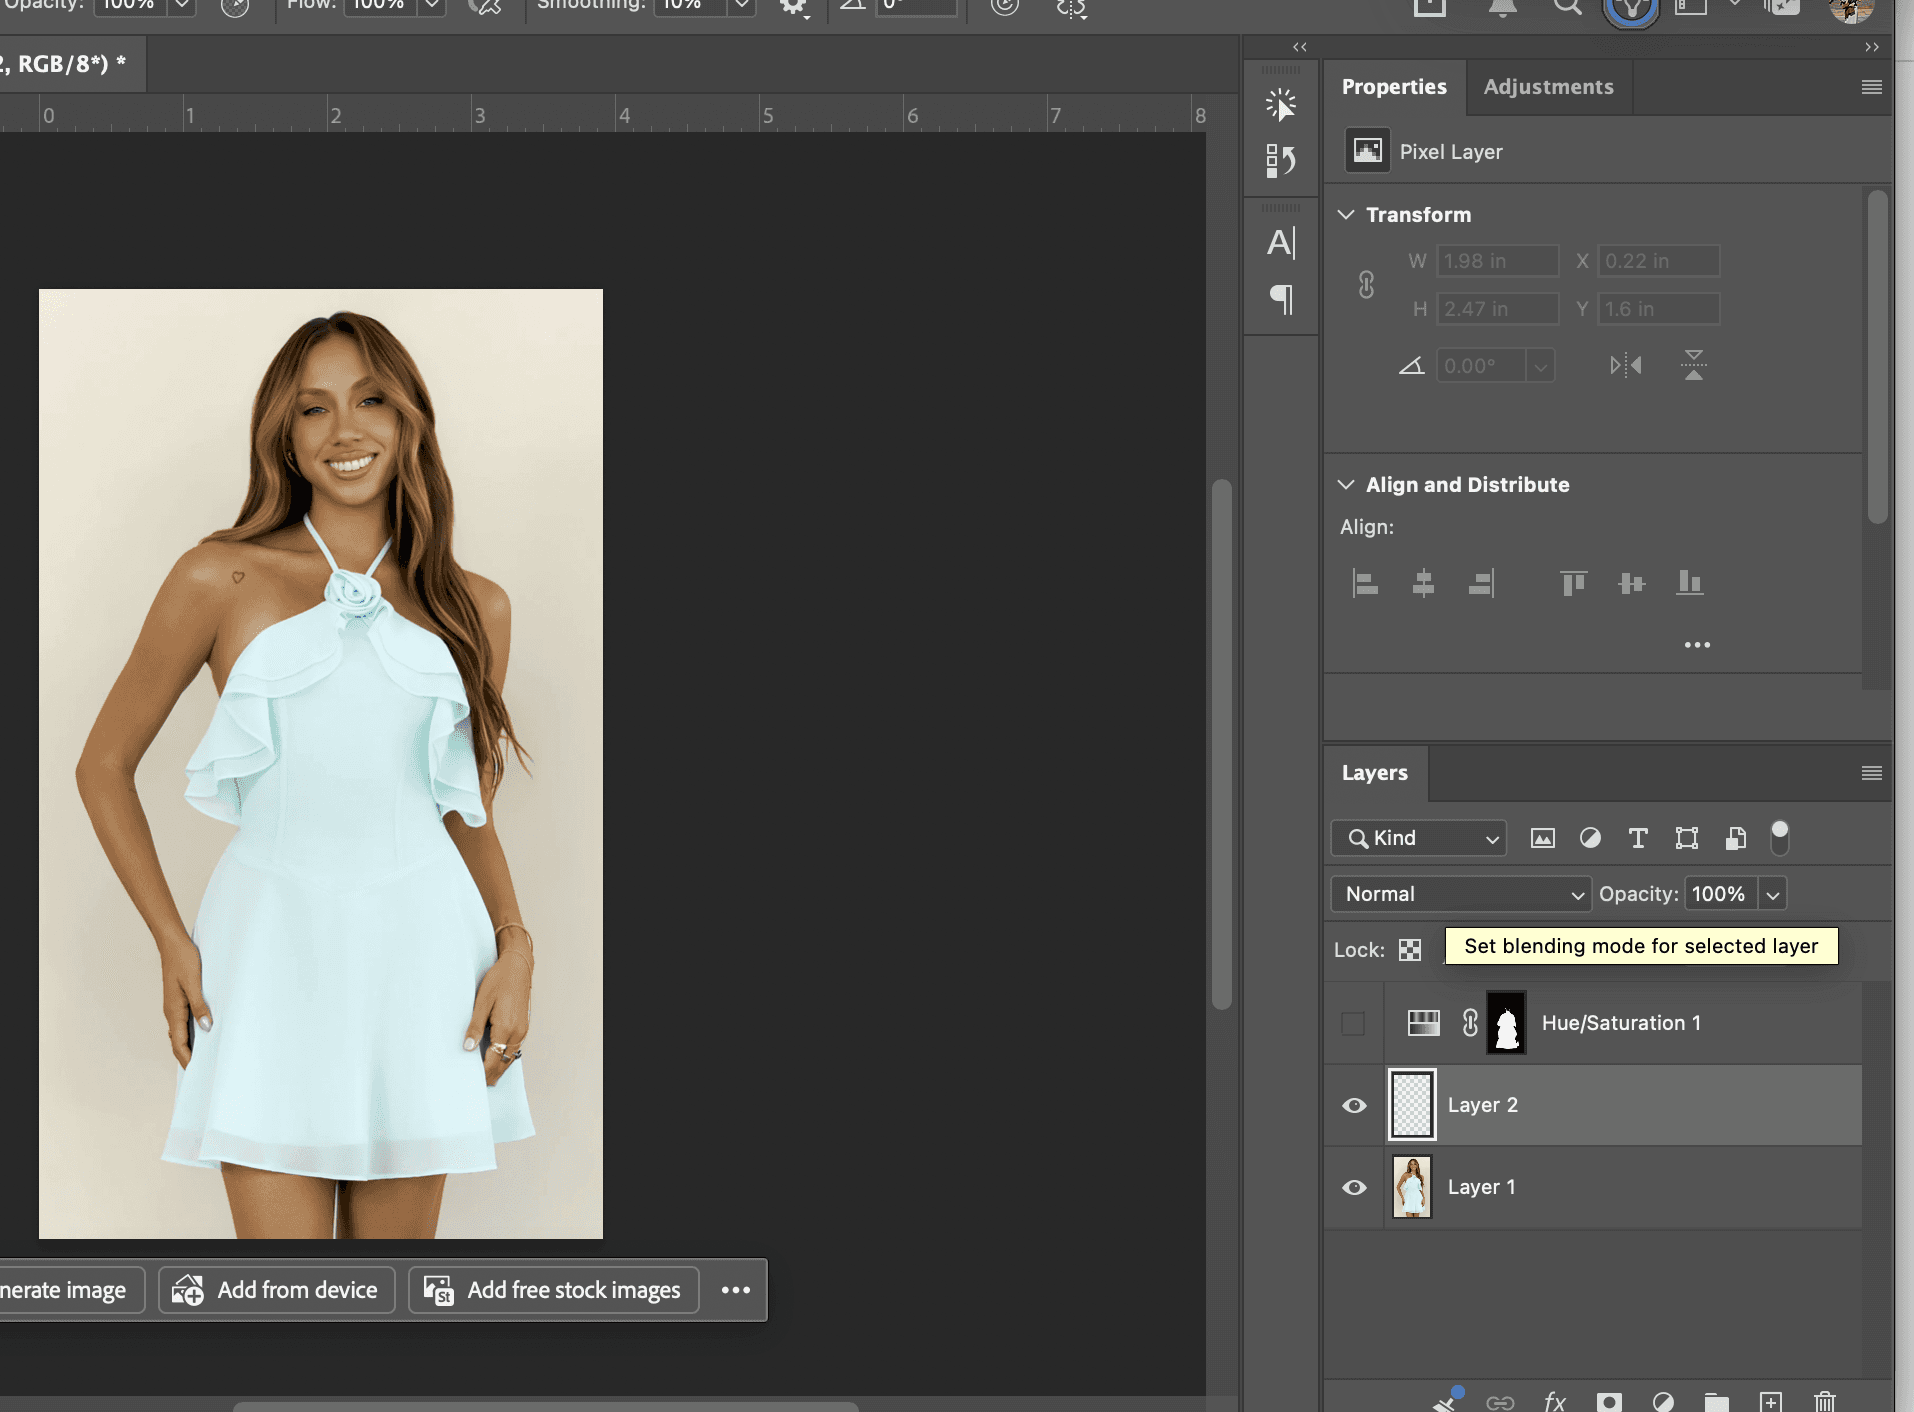
Pick your new color as the foreground and paint over the object with a soft brush.
Add a layer mask to clean up any spillover, and lower the layer opacity if the color reads too strong.
Best for:clothing and products where realism is everything, fabric texture, wrinkles, and natural shadows all stay put. When Marcus, who runs a small Shopify shoe brand, needed a tan boot shown in forest green, this was the only method that kept the leather grain looking real instead of like a flat sticker.
For the same reason, this method shines on apparel. If you have ever searchedhow to change color of clothes in Photoshop and ended up with a plastic-looking shirt, the Color blend mode is the fix.
Method 5: Selective Color and solid fills for exact brand colors
When you need an exact brand color, eyeballing the Hue slider won’t cut it. This approach lets you hit a specific hex or Pantone value for catalog consistency.
Step by step:
Make a precise selection of your object.
Add a Solid Color fill layer (adjustment-layer icon > Solid Color) and enter your exact hex value.
Set the fill layer’s blend mode to Color so texture shows through.
For finer control over tones, add a Selective Color adjustment layer and tune the cyan/magenta/yellow/black mix per color range.
Best for:brand-accurate recoloring where the color must match a spec sheet across every product image. This is the method that keeps a catalog looking consistent rather than “close enough.”
Bonus: How to change a background color in Photoshop
Background recolors are one of the highest-volume versions of this task, so here is the quick path.
Use Select > Subject to grab the product, then Select > Inverse(Cmd/Ctrl + Shift + I) to select the background instead.
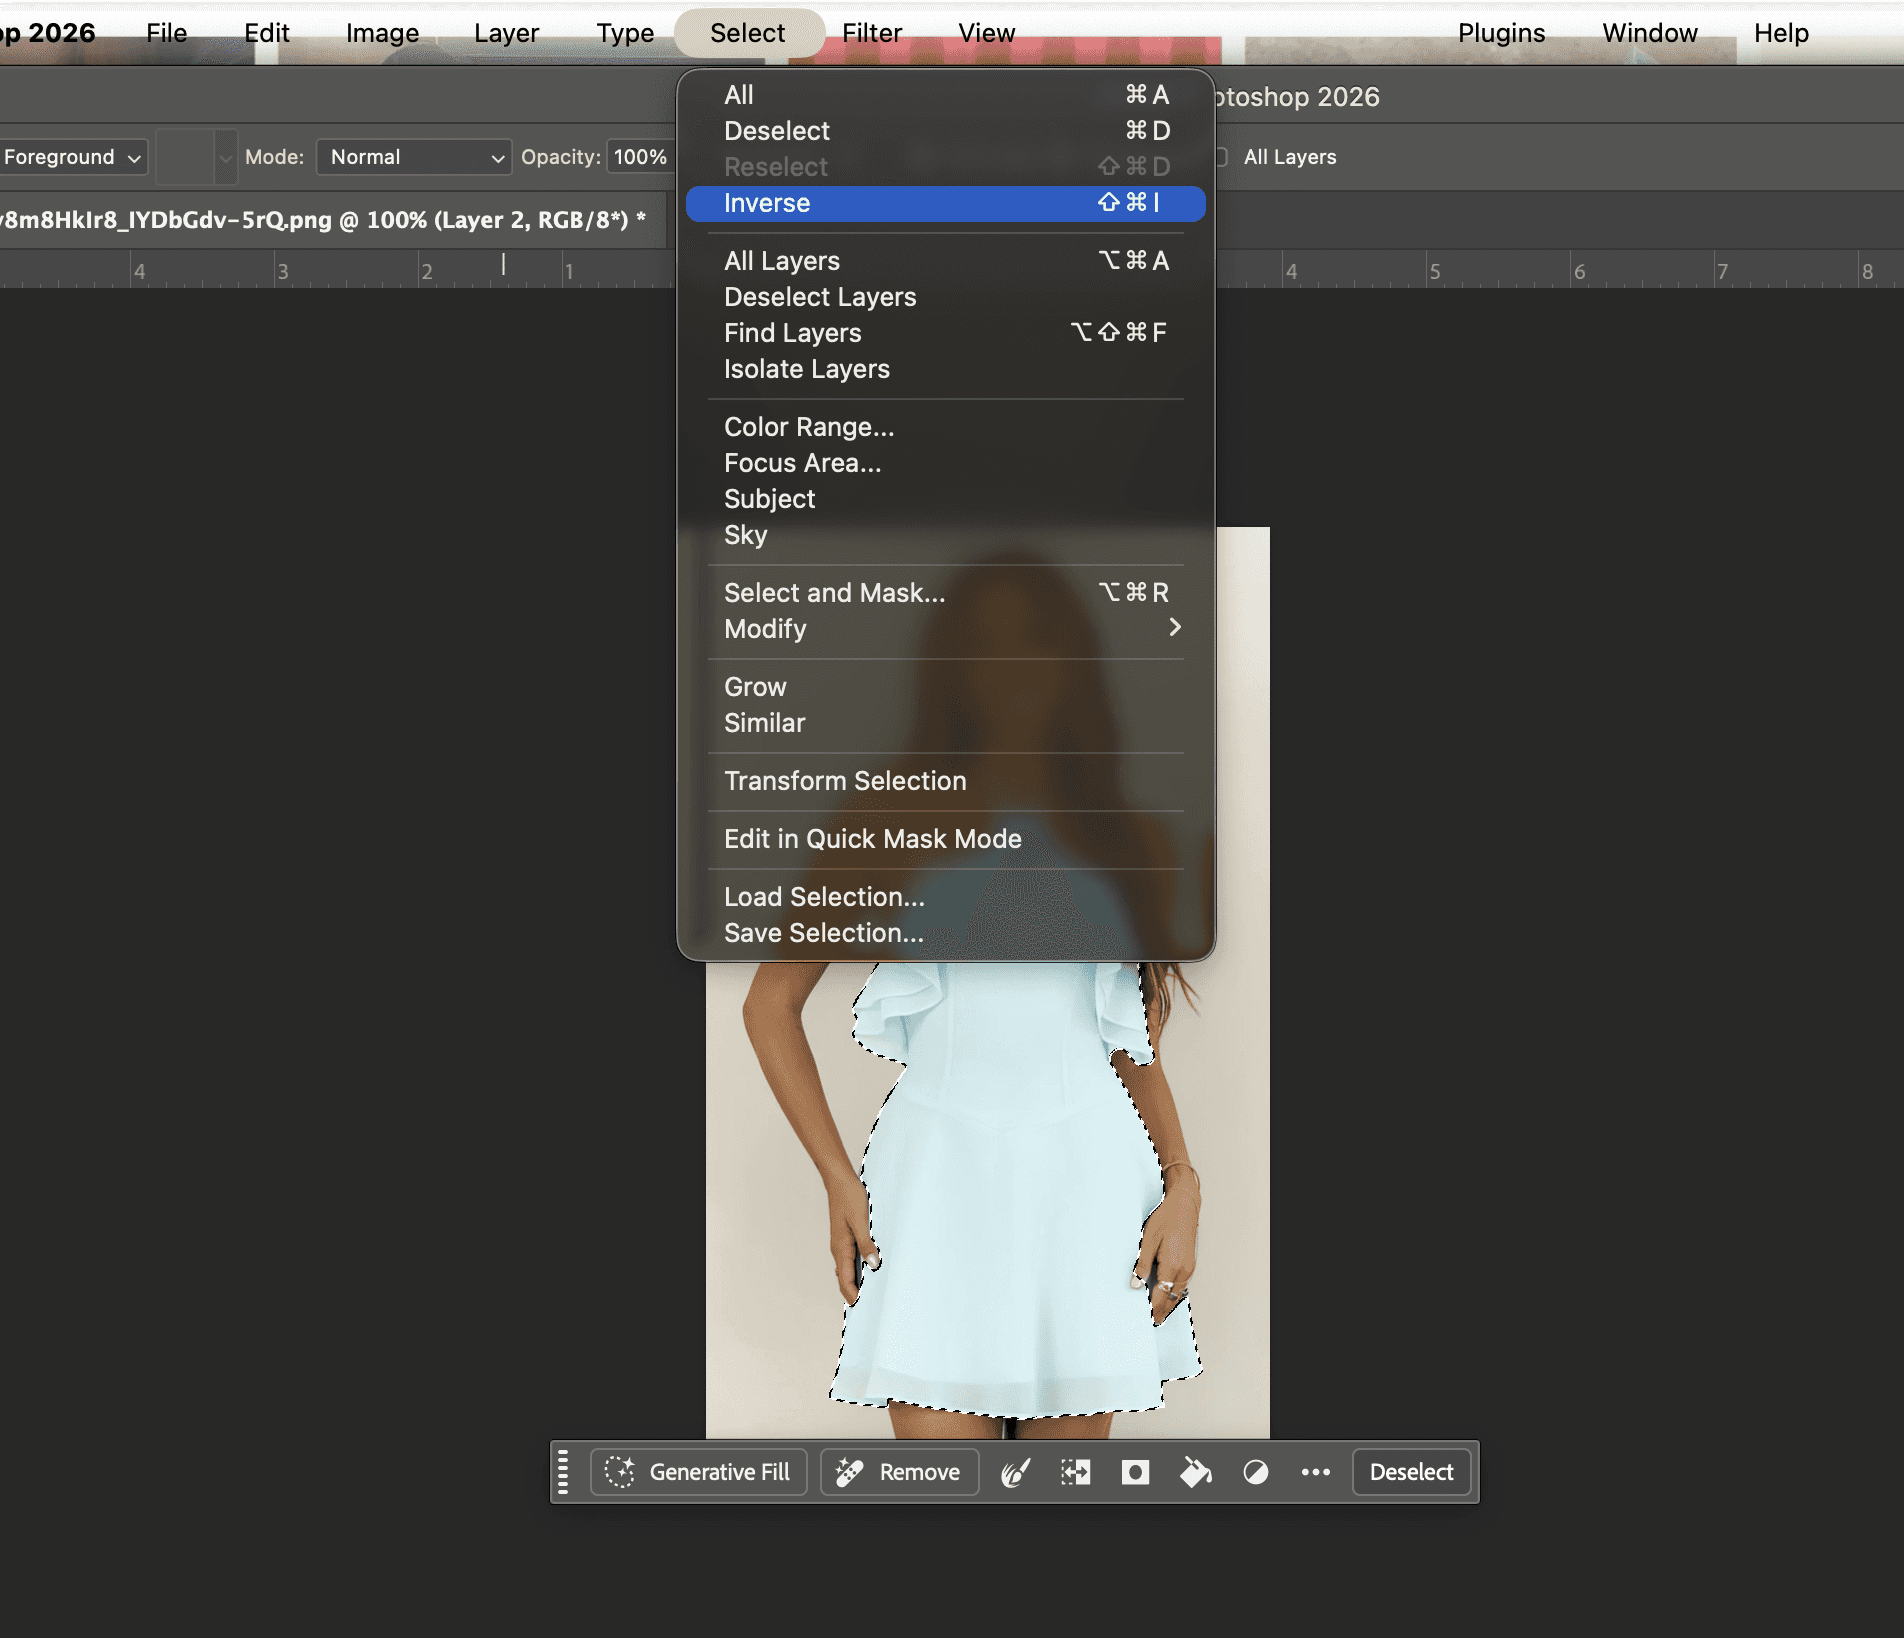
Add a Solid Color fill layer, or a Hue/Saturation layer, and set your new background color.
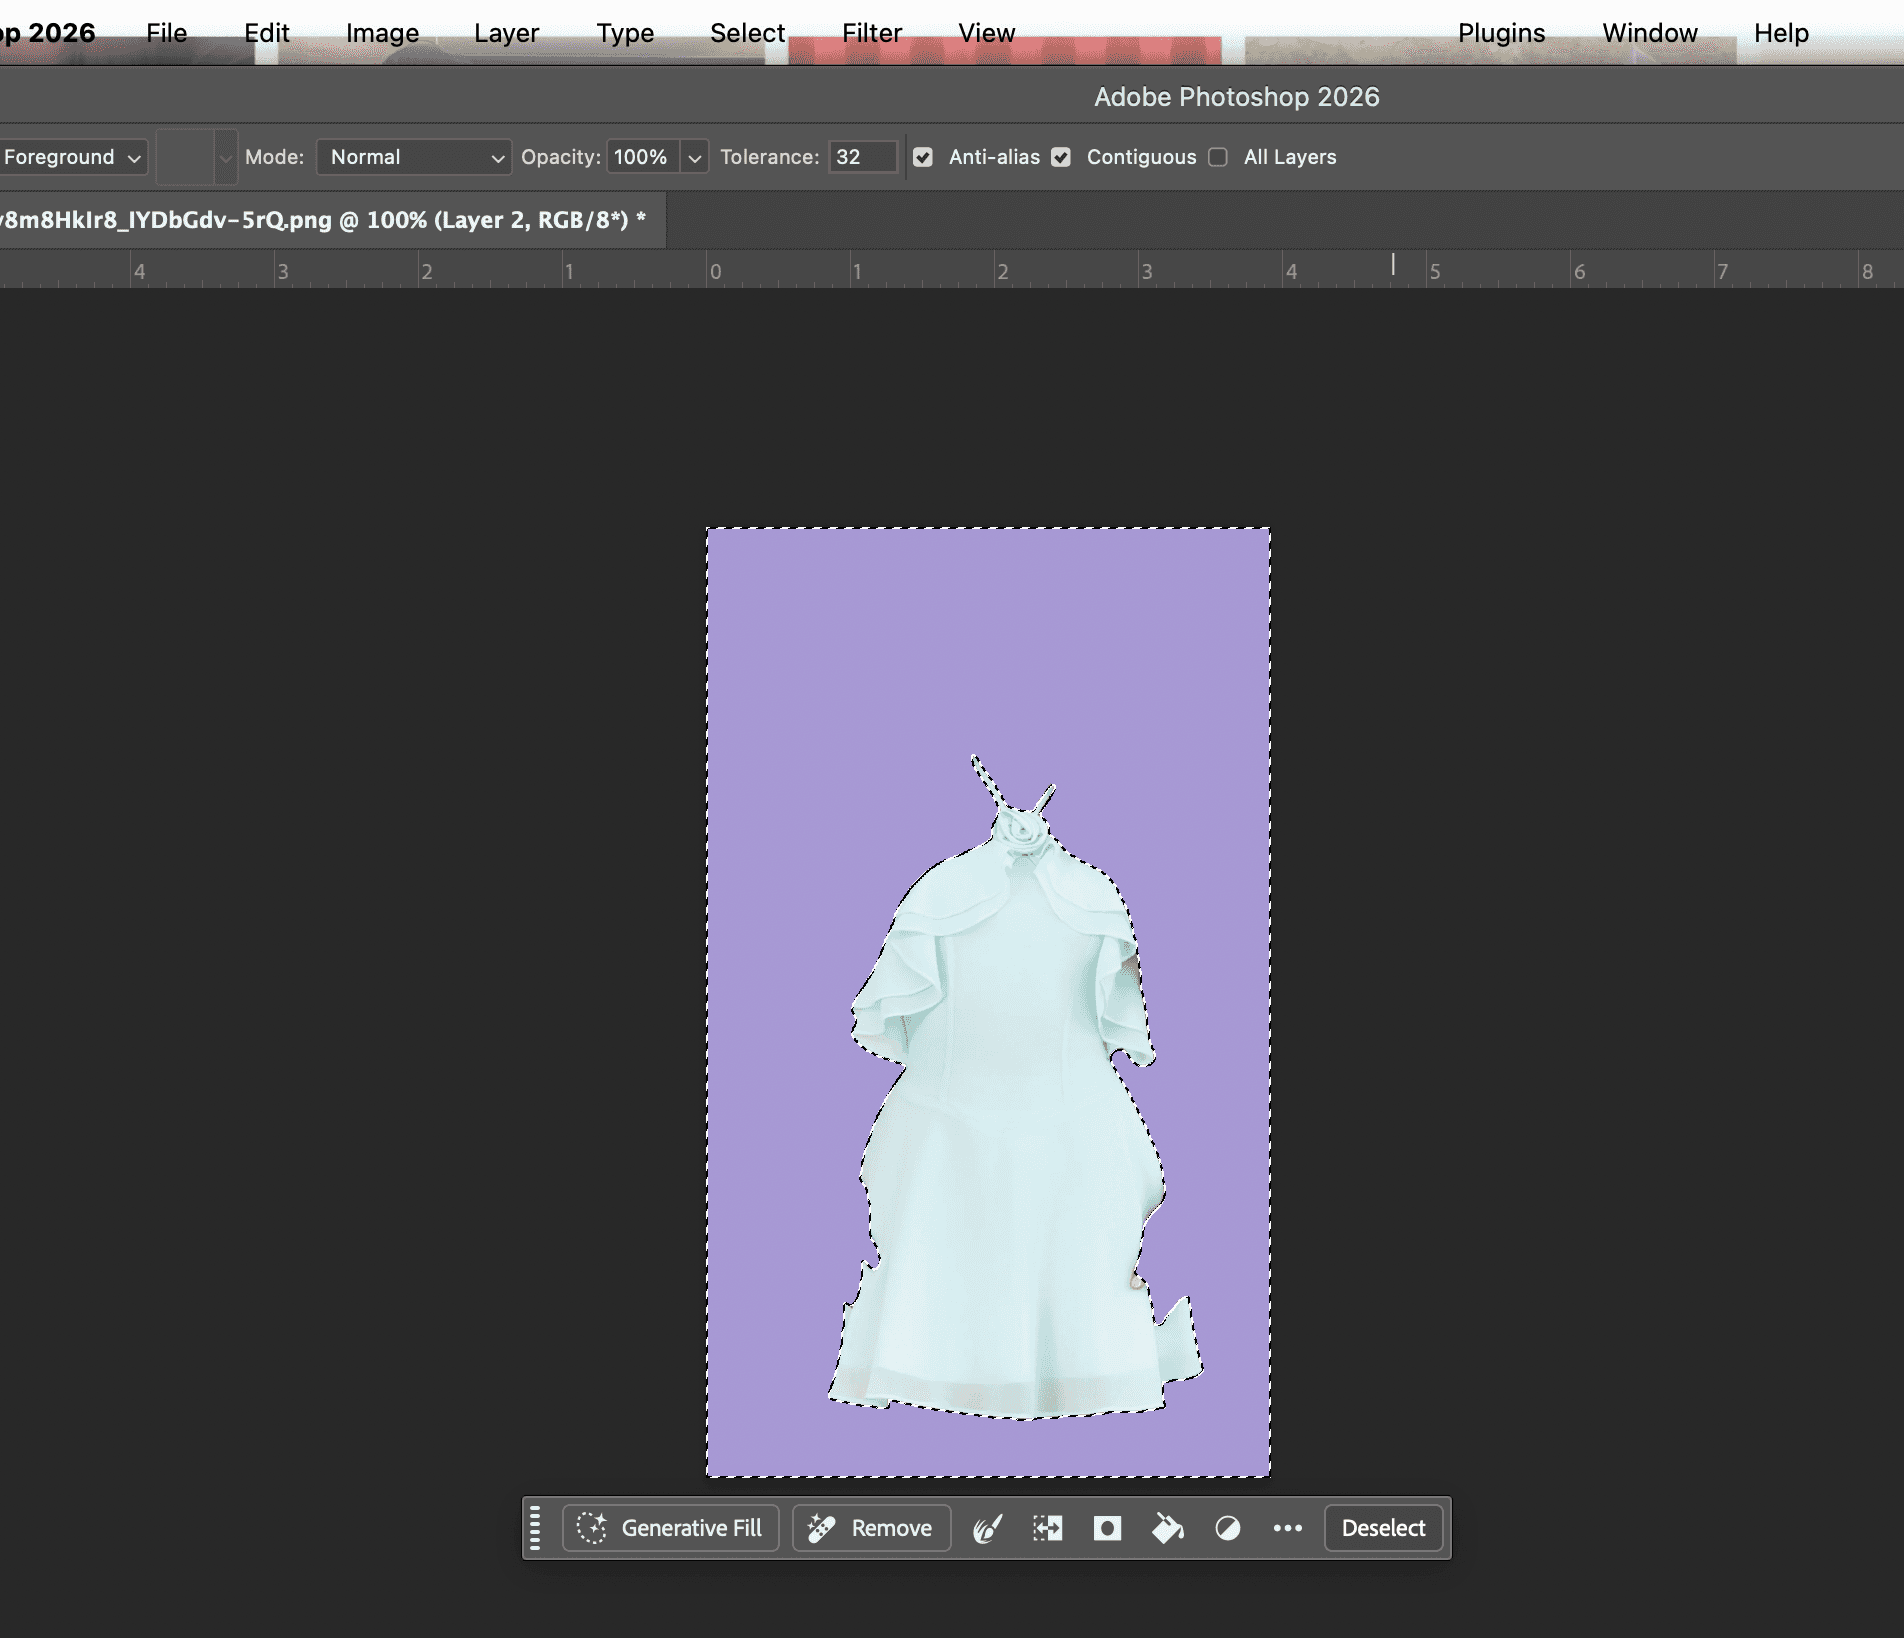
Refine the mask edges so the product doesn’t pick up a halo.
For multi-channel work, where you need the same shot on white for the PDP and on a colored backdrop for an ad,one-click background swaps save the repeated masking. We will come back to that.
Which method should you use?
Each method earns its place. Use this table to pick the right one fast.
Method | Best for | Realism | Speed | Editable later |
|---|---|---|---|---|
Hue/Saturation layer | Quick hue shifts on colored objects | Good | Fast | Yes |
Replace Color | One specific color across an image | Medium | Fast | No (destructive) |
Color Replacement Tool | Small areas and touch-ups | Good | Medium | No (destructive) |
Color blend-mode layer | Clothing and products, keeping texture | Excellent | Medium | Yes |
Selective Color + solid fill | Exact brand/hex colors | Excellent | Slower | Yes |
Master these five and you’ll know how to change color in Photoshop for almost any object. Here is a clear walkthrough of the core techniques if you want to watch them in action:
When Photoshop stops scaling: the AI route for product color variants
Photoshop is excellent for one image. It’s brutal for fifty.
If you sell online, the real job is rarely “recolor this one shirt.” It’s “show this jacket in eight colorways, on-model, across the whole catalog, before the drop.” That’s where the manual workflow breaks. Eight colors times fifty SKUs is 400 masks, and every one risks a slightly different green.
This is the exact problem Caimera’s Recolor tool was built for. You upload one product shot and generate on-brand color variations in minutes, at2 credits per variation. The shadows, fabric texture, and folds stay realistic automatically. No masking, no blend-mode fiddling, no 400 layers. It’s the difference between a Photoshop afternoon and a Photoshop week.
Pair it with Flatlay to Catalog and the math changes again: upload a flatlay, generate on-model shots across multiple poses and models, then recolor the whole set. Brands like H&M, Puma, and Steve Madden run this kind of workflow to ship catalog imagery10x faster at 99.3% lower cost per imagethan a traditional studio. We wrote more about that shift in our roundup of AI photography tools that replace expensive photoshoots.
To be clear: this isn’t “AI beats Photoshop at everything.” Photoshop wins for one-off retouching, compositing, and pixel-level control. The AI route wins when you need many on-brand color variants fast, which is most of what e-commerce actually demands.
Want to test it on your own product? Start free with 50 credits, no card required, and see how many colorways you can ship before lunch. When you’re ready to scale, plans start at $15/month.
Frequently asked questions
How do you change the color of a layer in Photoshop?
Add a Hue/Saturation or Solid Color fill layer clipped to that layer (right-click > Create Clipping Mask), then adjust the Hue slider or enter a hex value. Clipping keeps the change locked to that one layer.
How do I change color in Photoshop to a specific color?
Use Replace Color and enter the exact Hue/Saturation/Lightness values, or add a Solid Color fill layer with your hex code set to the Color blend mode. The fill-layer method is the most precise for brand colors.
Is there a shortcut to change color in Photoshop?
Yes. Press Cmd/Ctrl + U to open a Hue/Saturation adjustment instantly. With a selection active, the change applies only to that area.
How do I change color in Photoshop without losing texture?
Paint on a new layer set to the Color blend mode, or set a Solid Color fill layer to Color. Both apply hue while preserving the original brightness, so texture and shadows stay intact (Method 4 above).
How do I change the color of clothes in Photoshop?
Select the garment with Select > Subject, then use a Color blend-mode layer (Method 4) for realistic fabric, or a clipped Hue/Saturation layer for a quick shift. For many garments or colorways at once, an AI recolor tool is far faster than masking each one.
What is the fastest way to make many product color variants?
Hand-recoloring in Photoshop doesn’t scale past a handful. To generate many on-brand variants quickly, use a dedicated AI tool like Caimera Recolor, which produces realistic color variations from a single image at 2 credits each.
Conclusion
Now you know how to change color in Photoshop five different ways: Hue/Saturation for quick shifts, Replace Color for single-color swaps, the Color Replacement Tool for touch-ups, the Color blend mode for texture-true realism, and Selective Color with solid fills for exact brand colors. Match the method to the job and you can recolor almost anything.
But remember Priya and her Friday drop. The manual methods are perfect for one image and painful for fifty. When your real task is dozens of product color variants across a catalog, Caimera’s Recolor generates them in minutes instead of days, with the texture and shadows handled for you.
Start with the Photoshop method that fits today’s job. When the catalog gets bigger than your afternoon, try the AI route free and ship your next set of colorways before the drop goes live.